Printmaking
There are a number of different printmaking techniques: intaglio (etching, drypoint, mezzotint, metal engraving, collagraph); relief (woodcut, linocut, chine collé, wood engraving); lithography; screenprinting; and monotype. My work is mainly produced using traditional screenprinting techniques:
SCREENPRINTING OVERVIEW
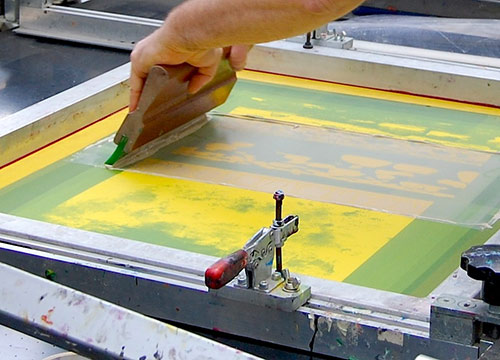
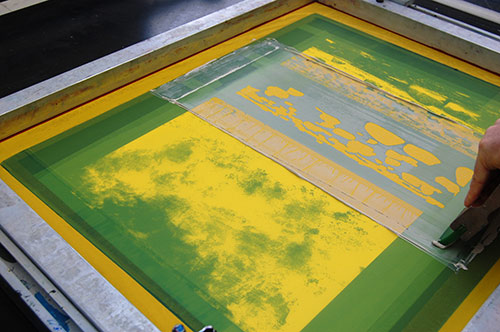
In simple terms, images (stencils) are applied to mesh screens stretched on a frame. A number of different screens provide multiple coloured layers to build up the finished full colour image. A screen bed is used to hold the screen and paper in position and the ink is pushed through the mesh with a squeegee.
CONCEIVING THE IMAGE
The image is created through multiple coloured layers, so to create a successful print, deconstructing the final image into a series of individual layers and understanding how overprinting will affect previous stencil images is critical, although some artists prefer to experiment while they are printing. There are a number of techniques – drawing, painting, photography, cutting – used to create each image and often more than one method will be used.
CREATING THE SCREENS
Each stencil image, or coloured layer, is printed through a screen, which is a polyester mesh stretched over a wood or aluminium frame. Stencils can be produced in a number of different ways to create alternative effects:
Cut Paper and other sheet materials can be used and applied directly to the screen to create sharp edges and flat colour
Drawn or Painted Graphite, chinagraph, pastel, charcoal, ink, paints – are some of the materials used to apply marks to a translucent film and then transferred to the screen by a photographic process using a light-sensitive emulsion coating
Photographic Photography can be manipulated and separated before transferring the image, or images, to the screen using the same method as a drawn or painted stencil
PRINTING THE IMAGE
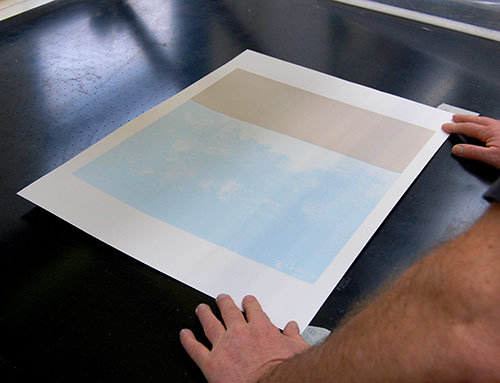
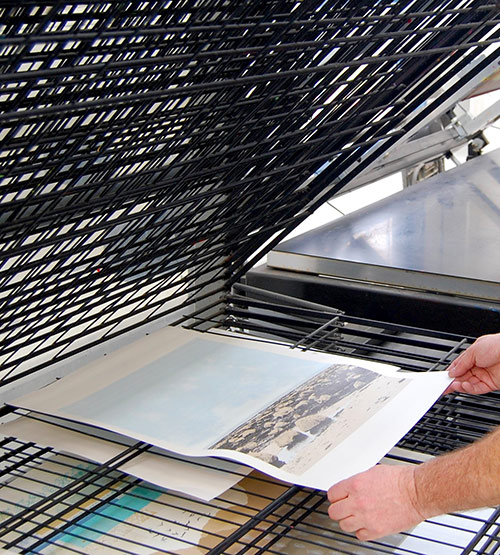
Although a clear plan for the order of applying each coloured layer is important at the start, it should also be flexible to allow some adaptation should the results require a level of improvement or improvisation. The inks now used in screenprinting are water-based acrylics – more environmentally friendly than the previous oil-based ink process. The paper is held in position on the screen bed, the screen is lowered over the paper and the pre-mixed ink colour is pushed through the screen using a squeegee. The screen is lifted and the paper removed for drying in a rack then the next sheet of paper is placed in the same position, applying the coloured ink layer as before until the number of prints for the edition has been printed. Equipment is cleaned and, once the paper is dry, the next stencil image is applied in exactly the same way, after the image has been aligned/ registered with the previous layer. The process is repeated until all the different coloured layers have been applied and the final image has been created.
LIMITED EDITION PRINTS
Simple images can be produced with 3 or 4 stencils but more complex prints can involve 10 or more separate coloured layers. The size of the edition is decided by the artist and the smaller the number produced, the more exclusive the image will be. This is normally indicated on the bottom left corner of the print – the first figure indicates the print number and the second identifies the size of the edition (e.g. 4/12 means print number 4 out of an edition of 12 in total). It is important to understand how an image has been produced as original paintings and drawings are often digitally reproduced and printed mechanically in large quantities (150 or more) and, although each print may be signed by the artist, these are very different to a hand-produced limited edition print using traditional methods.
All my prints are in strictly limited editions: hand-produced; numbered; titled; and signed by me.